If you’ve been in business for longer than 5 minutes, you probably understand that having a list of devoted followers’ emails can be huge for growing your business.
But how do you build up that email list in the first place?
One of the best ways to grow your email list is by using something called a Lead Capture. Bonus, if you have a WordPress website, this can be really easy to create using the Gravity Forms plugin.
What is a Lead Capture?
If you haven’t used a lead capture before, it’s a pretty simple concept. Basically, you provide something of free value (e-book, PDF guide, walkthrough video, template, etc) in exchange for an email address. You’ve probably gotten on some of your favorite online service providers’ lists because you wanted a free guide they offered, knowing that you’d be added to their email list.
Once someone has signed up, you can nurture them through a sequence of emails, sharing with them new content each week, and selling your services in a gentle, approachable way. After all, they wanted that free thing; changes are once you build up some trust they’ll be interested in spending money with you, too.
Lead Capture Best Practices
Once your ideal audience member has provided an email in exchange for your freebie, what should happen next?
First, you’ll want to ensure the form they’re filling out feeds into your Email Service Provider (ESP), i.e. Mailchimp, Convert Kit, Constant Contact, or Active Campaign. All of the top Email Service Providers give you the ability to copy/paste a code onto your website where you want that form to appear (though there’s an easier way we’ll get to below). You can create the sign up form in your chosen ESP, drop it into the spot you want on your website, and as soon as someone fills it out they’ll be on your list.
Thanks to GDPR and some other international privacy laws, however, you’ll want to set up what’s called a double opt-in. Basically that means you want someone to confirm that they want to be on your list via an automatic email confirmation. The nice thing is that most ESPs I work with now make that an automatic thing, so they’ll send a “Please confirm you want to join this list” type of email.
The trick here is that you want to provide your freebie only after they’ve completed the double opt-in. Whether you take them to a landing page on your website after they’ve confirmed or you send a second email with the file (depending on what you’re giving away), you’ll want to make sure they’ve agreed to be on your list fully before.
Using Gravity Forms for Lead Captures
Now, want to make this all a little easier? Use Gravity Forms to feed into your ESP and make adding a form to your website super simple.
I’ve talked before about how adding contact forms to your website is easy with Gravity Forms. Thanks to some special bonus features, you can also use a Gravity Form on your WordPress website and feed that information directly into Mailchimp or your chosen ESP. Gravity Forms does require a Basic license – $59/year – but add-ons for the biggest email service providers are included in that lowest plan.
When it comes to creating a lead capture that feeds into your ESP, you just need to ensure you have the right add-on installed and then configure the form. Let’s walk through it.
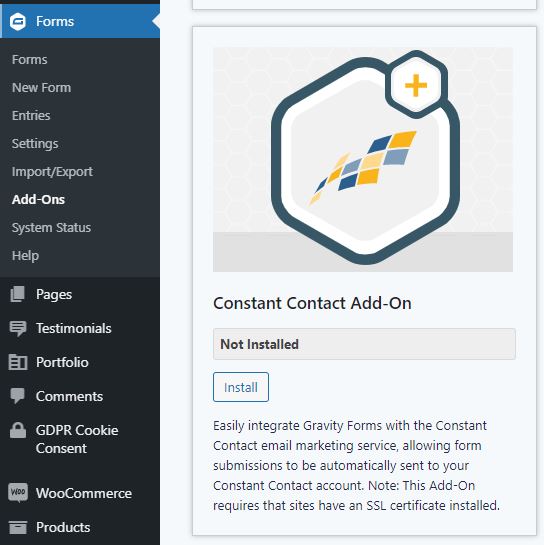
1. If you have Gravity Forms installed and active, you just need to go to Forms > Add Ons in your WordPress admin and then find your ESP and Install the correct Add On. Like Constant Contact below.
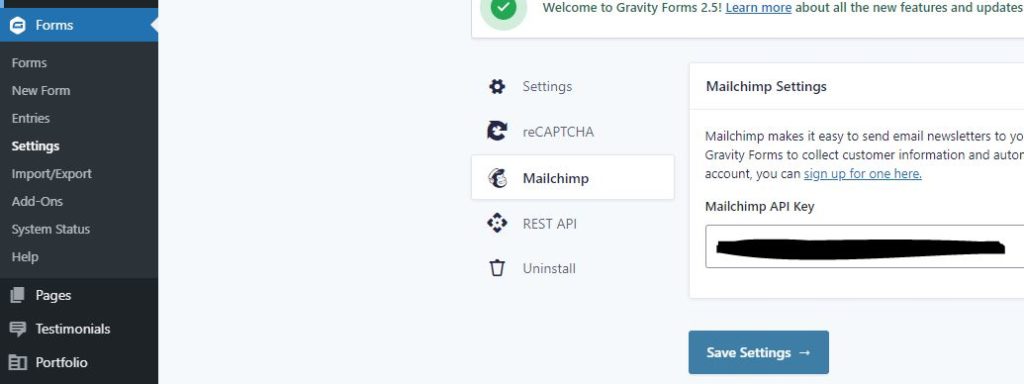
2. Once you have the right Add-On installed, you’ll need to connect it to your account. That can look a little different depending on which one you use, but you’ll go to Forms > Settings and find the tab with your ESP. Gravity Forms will give you the instructions to walk you through how to add what you need to. For MailChimp, for instance, you just need your API key from your account.
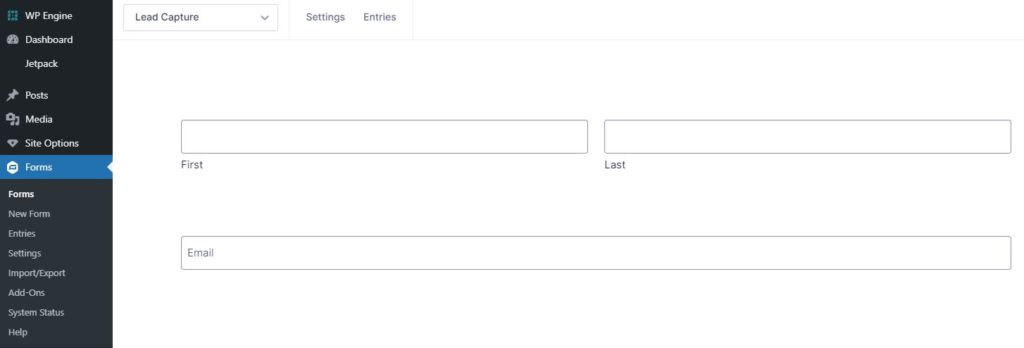
3. Now you can create your form! You’ll probably just need two fields, Name and Email, in the form.
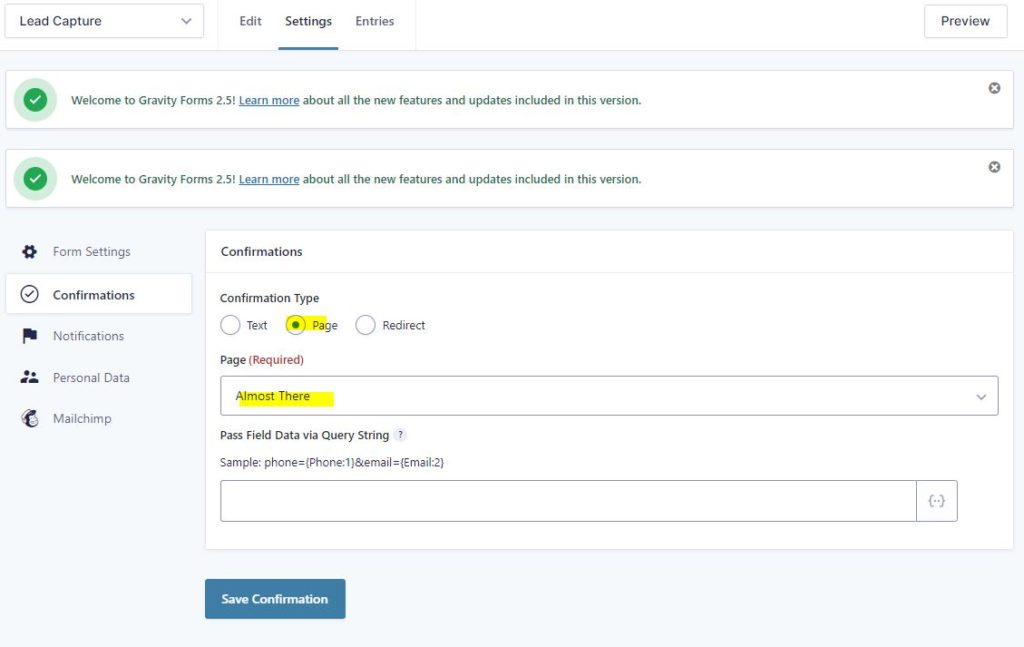
4. Next you’ll want to set up the confirmation. If you’re following the best practices above and using a double opt-in, you’ll want to create a hidden (not linked) page on your website that basically tells people that once they’ve filled out the form what they need to do. Mine simply states that you need to check your email and confirm you want to receive my freebie. The cool thing is that Gravity Forms lets you set a page redirect as a confirmation instead of a simple “We got this email” message.
5. Now go to your ESP and set up your double opt-in confirmation email. How that works depends on who you use.
6. Depending on how you want to deliver your freebie will change what you do next. If you’re just emailing a file, you can set up that up as a final confirmation email in your ESP. Or, you can tell your ESP to route the confirmation to a hidden Success page you’ve built on your website to deliver a video/file to download. I’m personally a fan of bringing them back to your site because that might mean they’ll spend more time on your website after they’ve gotten their freebie.
7. Add your completed lead capture form to wherever you need in your website using the Gravity Forms shortcode, Gutenberg Block, or Add Form option.
That’s it! Using Gravity Forms means that you have a backup of who’s filled out that form in your Forms > Entries and it means that you don’t have to mess with code at all. Since Gravity Forms is one of the most popular WordPress form options, it also means that it works with pretty much every builder plugin and theme out there, making it extremely easy to connect and get working on your website.
And if you want to check out how a GF lead capture can work (plus get my free SEO checklist to get found on Google), test out mine below!


