
Your university strives to bring in the best of the best – but are you cutting some of those students out of the recruitment process? You could be if you’re ignoring the accessibility of your website.
Web accessibility is required under Title II of the ADA, but ensuring that your website is accessible to all potential students is about more than just compliance – it’s about reaching every student. When your website isn’t accessible, you can exclude up to 27% of those potential students. That means you’re missing out on the best and brightest.
Got a website you’re proud of already? Good news! You can do simple things to improve your web accessibility without redoing the whole thing. This is even easier when you have a WordPress-based website.
In this article, we’re going to break down the best practices you can follow to make your website more inclusive.
Let’s dig in!
Table of Contents
The Guidelines You Need to Follow
In April 2024, the ADA added a new Title II regulation requiring government and public entities to provide accessible websites. Technically you have until 2026 to follow all accessibility guidelines. Still, a recent accessibility lawsuit against the state of Louisiana was able to move forward because a judge stated that you cannot just ignore ADA guidelines until the deadlines arrive.
What are those guidelines?
For websites, your university needs to follow the Web Content Accessibility Guidelines (WCAG) 2.1, currently considered the international standard.
These guidelines follow four principles that are the foundation for web accessibility: the web content must be perceivable, operable, understandable, and robust. The POUR principle states that any user with any abilities can access the content of your website.
There are certain things you can do on your own to conform to WCAG standards, but to be frank, there are technical things that you’ll need to implement as well. While you may have to hire a web accessibility specialist, let’s discuss the common issues you can address independently.
Common Website Accessibility Barriers (And How to Fix Them in WordPress)
Like 43.4% of the internet, your university uses WordPress to power your website. Here’s why that’s excellent news – WordPress is built with many accessibility features in mind.
A little known fact about web accessibility is that it aligns with several SEO best practices, and WordPress originated as a blogging platform that was all about great SEO.
With WordPress, you have a foundation to take your website from inaccessible to more inclusive with a few tweaks.
Visual Impairments
Whether you realize it or not, prospective students have various visual impairments. Those students deserve to read the content, too, but you can do things that make it difficult or impossible for them to do so.
Helping Color-Blind Students
One of the most egregious mistakes I see on websites I audit is the combination of specific colors.
The font and background colors you use must have a high enough contrast to ensure those with color blindness can read the text you’re writing.
For instance, if you were color blind, you might not be able to decipher all of the numbers in this test chart:

How can you ensure that the content you’re writing or even graphics you’re making for social media are legible for everyone?
You use free tools like WebAim’s Color Contrast Checker to ensure that the colors you’re putting in your website are going to be readable:
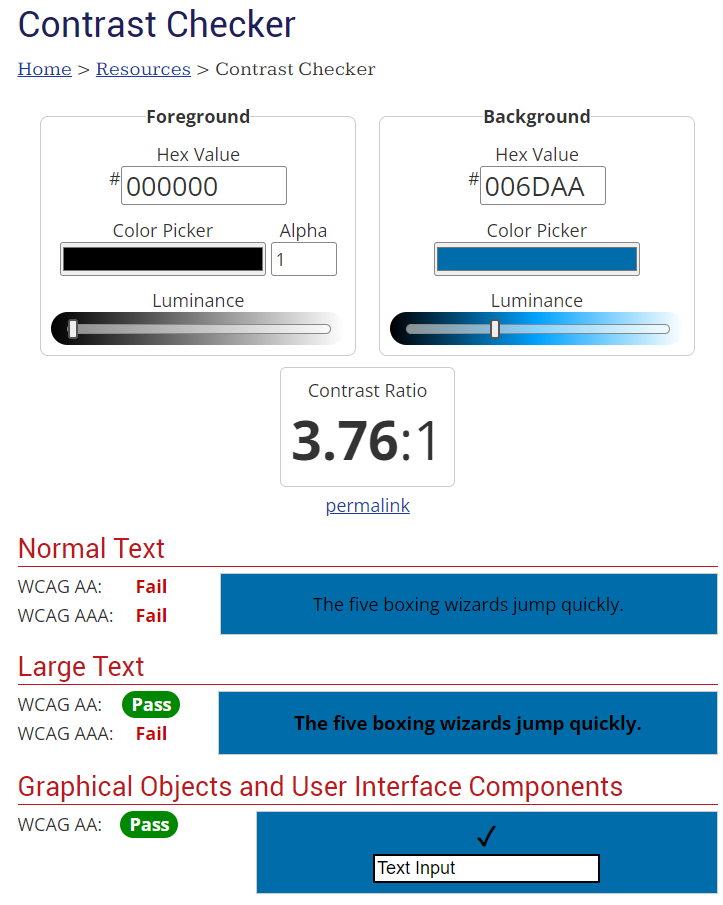
If it comes back as a fail, or even mostly a fail, that means not everyone can distinguish the text. And that quickly, you’ve excluded a bunch of students because you created content they can’t read.
Helping Blind and Visually-Impaired Students
Did you know that individuals who are blind or visually-impaired use something called a screen reader to browse the internet? The screen reader is quite literally reading the content of the internet back to them, using tools to help them navigate.
ALT Text
One of the big things we do to create an accessible internet for these students is to add ALT text descriptions to our images.
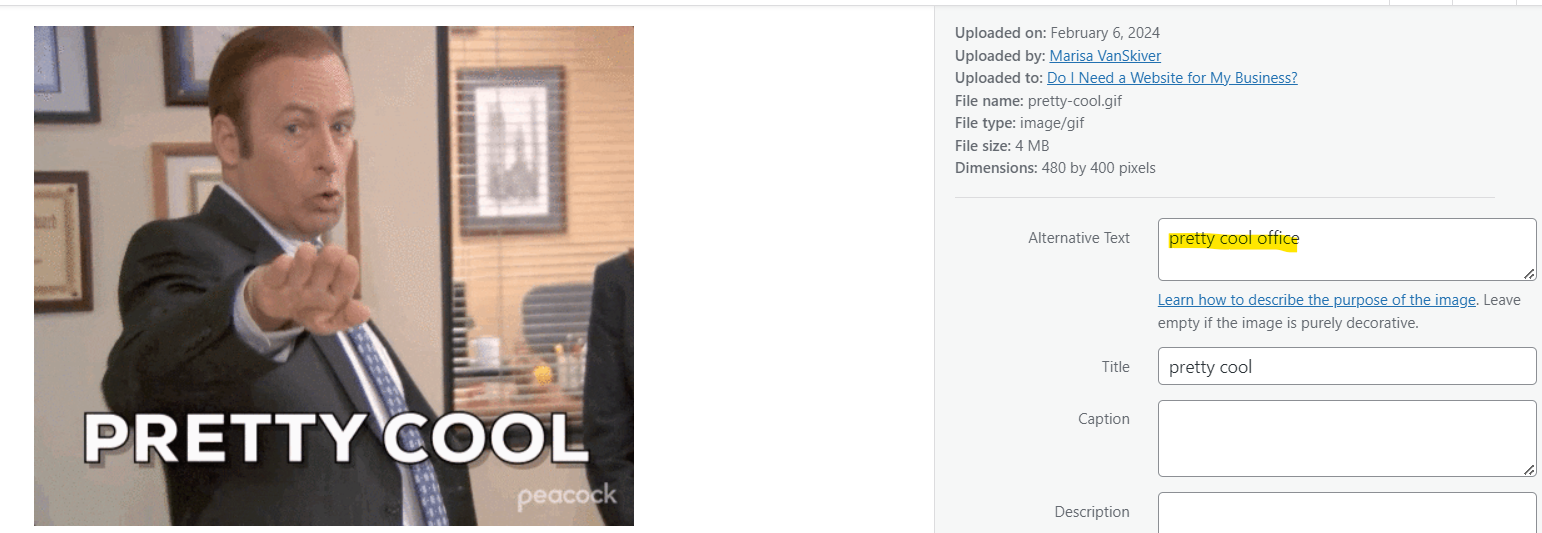
In WordPress, we do this through the Media Library or image options where there’s a spot for Alternative Text. There, we add a description of the image and then it automatically gets added to the front-end of our website.
If you’re unsure how to write ALT text for your images (somehow, writing a short description can feel like a lot), I’ve got a great beginner’s guide to ALT text.
One big thing to remember – don’t upload images that are just text. That’s not legible to all of your students and can mean they don’t get the context of what you’re posting.
Using Semantic HTML
Another thing that helps our visually-impaired students and their screen readers? Using semantic HTML.
Admittedly, this one can be where the technicalities come in. However, as someone posting content to your website, you can improve this by using the correct headline sizes.
You see, headlines are meant to distinguish between ideas, keeping the content organized. Unfortunately, a lot of people use them for design purposes without putting a ton of thought into what that H2 option means.
So let’s break it down.
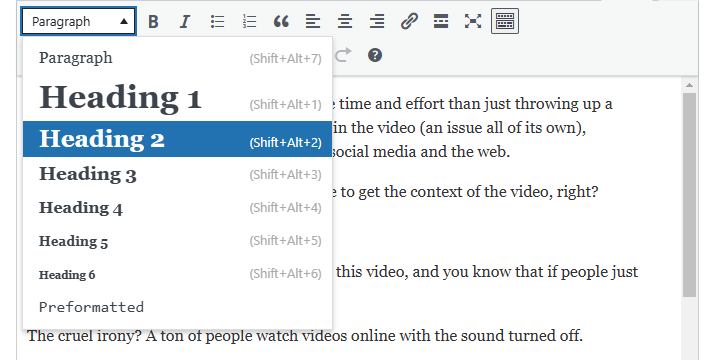
With headings, you have options from H1 down to H6. The H1 or Heading 1 is your main thought for the page. You get one H1 per page, which should stylistically be the largest headline on the page.
Then, as you move down the page, you use a Heading 2 to introduce a new section or thought, Heading 3’s and down to break up that content.
I’ve done exactly that in this blog post (heck, this time I’m getting all the way down to an H5).
When you use headings correctly – both as the HTML tag and in size, you’re making it easier for your readers to skim through your content to get to the part that matters to them.
In WordPress, it’s relatively easy to select the heading size you want from a dropdown menu when you’re writing content – no matter what theme you’re using on your website.
Setting Simple Page URLs
When you create a page in WordPress, it should automatically set up the URL for that page, or slug, to match the post or page title.
But as you can imagine, some of our page titles can be long, and we want to keep URLs short, especially for screen reader users (who get that URL read back).
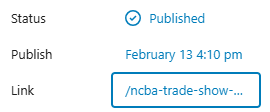
In WordPress, you can set the Permalink directly in the page to make the URL more concise. You want to ensure you add dashes between individual words so the screen reader can read that directly.
In classic WordPress set-ups, you’ll see the permalink under the title:

In the newer WordPress layout called Gutenberg, you’ll see it in the sidebar:
Hearing Impairments
Video and audio content can be a great way to reach your students differently, but are you making that content accessible to everyone?
Whenever you include audio or video content on your website (especially when that video has any kind of narration), you want to ensure that you’re offering either live captions or a transcript option.
WordPress makes it super simple to upload a YouTube or Vimeo video to your website, but to have the captions on those videos you’ll need to upload them to your video service. Once they’re there, however, you’ll have great videos accessible to everyone.
Reading Impairments
Perhaps the most overlooked part of web accessibility? Writing content that everyone can read.
You will have students with dyslexia or other reading disabilities, and complex text can be a barrier.
If you want to create content that’s accessible to everyone, you need to write for a lower-secondary level.
This means stripping out technical jargon, using straightforward language, and shorter sentences.
Luckily, you can do this with your content before it gets to WordPress, but we’ll dive into some tools to help make this (and other items) easier!
WordPress Accessibility Plugins
Maintaining an accessible website takes time and the right processes to stay on top of things. While you can do a lot of what we’ve talked about with native WordPress tools, you can use a few different plugins to make things easier (and improve your workflow).
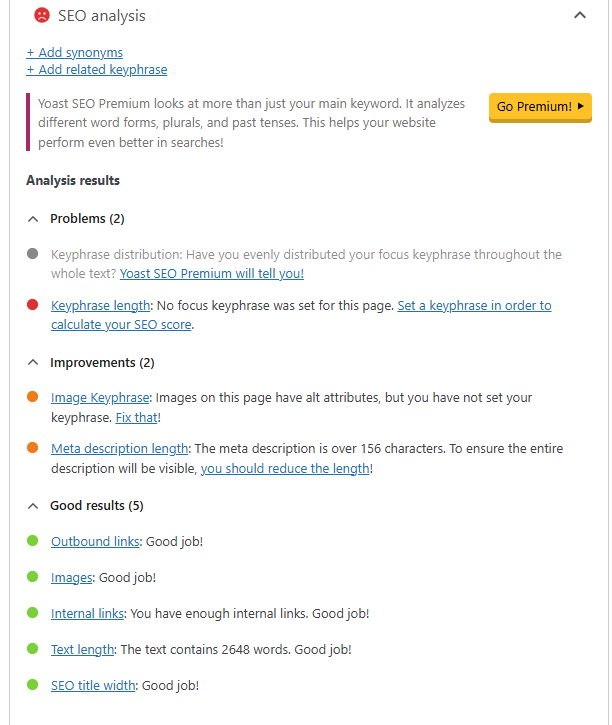
Yoast SEO
Yoast is a free plugin (with a paid option) that allows you to take better control of your on-page SEO and add accessibility enhancements to your website.
For one, it makes it super simple to add meta titles and descriptions to each page and post of your website, which aids those who use screenreaders to understand the context of your page.
But it helps to check the content on your page to ensure that you’re following SEO and accessibility best practices. This includes flagging whether or not your images have ALT descriptions, your overall readability, and lets you set the permalink options pretty easily.
Yoast makes it easy for you to improve your SEO and accessibility by turning the good things green and showing you the items that need to be addressed.
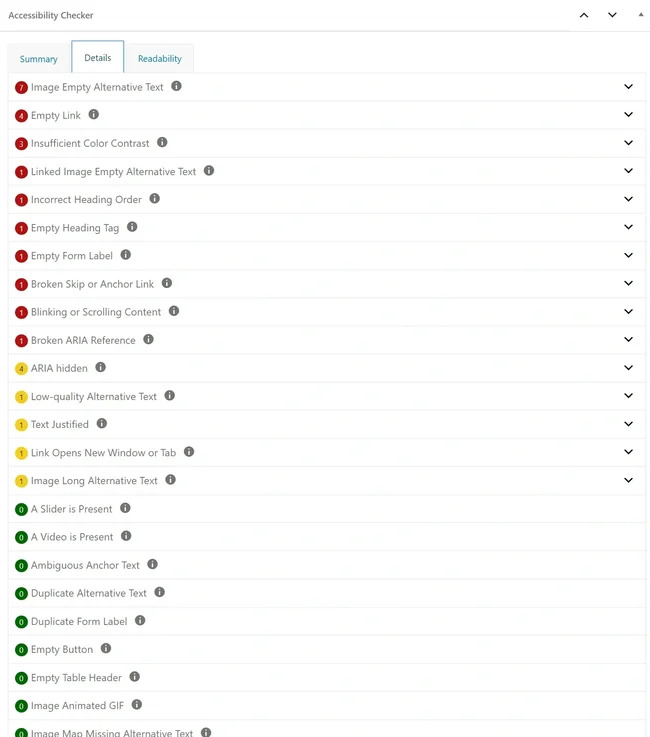
Accessibility Checker
Made by NASA’s own web accessibility specialists Equalize Digital, Accessibility Checker is an automated plugin created by those who truly understand accessibility.
With their free version, you can get alerts for issues like missing ALT text, color contrast, broken links, etc. It’s a great way to improve your content before you ever hit publish so you’re finding the issues before they go live.
Hemingway App
Not a WordPress plugin, but Hemingway is a tool that can help you check your overall readability before you put that content into your website.
With their free version, you can get your content’s overall grade level and suggestions to improve your readability. It also helps flag jargon and hard-to-read sentences so that you can simplify.
This differs from other AI tools because it takes the content you’ve already created and helps you simplify it so all prospective students can read it.
Declare Your Accessibility Commitment
The first place you should start with your accessibility journey? Create an accessibility statement and place it on your website.
This statement shows your commitment to website accessibility and should discuss your process for improving your accessibility.
For many of the lawsuits I’ve seen, having a plan and showing you’re actively working to improve your website’s accessibility goes a long way to keeping you out of trouble.
The web accessibility statement should be linked at the bottom of every website page (like where you include the links to your Privacy Policy or other legal pages). The statement should clearly show what level of accessibility you currently adhere to, address any known issues, and give your users the ability to provide feedback or request alternative formats for information.
This is something that should be run by your legal representatives, but you can use the free accessibility statement generator from W3C to get something started.
Integrating Accessibility into Your Website Strategy
Now is the time to take action. If you put off your web accessibility improvements, you can be looking at some expensive legal bills and excluding some of the best students.
Accessibility isn’t just a one and done thing either. This is a constant process that you must work on to improve and ensure you stay compliant continually.
When you make web accessibility a part of your overall website strategy, you’ll save time in the long run because you’re not going back and fixing hundreds of images, posts, videos, or other pieces of content throughout your website.
Take an extra 5 minutes every time you work on your website to save yourself giant headaches later? Sounds like a win-win to me.
Want to make your web accessibility an easy process? Grab my free accessible content checklist. It’ll have everything you need every time you’re updating your website.


