One of the most powerful forms of marketing right now? Video.
There’s something so deeply personal and accessible when a company chooses to use video in its social media, on its website, or in other areas of its marketing.
Video allows us to build a connection with our audience – almost like we’re peering into a window – when it’s done well.
If you’re using video to connect with your audience, you don’t want to exclude some of them from those videos.
I see this all too often when businesses upload videos and forget one crucial thing – making them accessible to those who are hard of hearing.
Let’s break down how to create accessible videos that reach your entire audience.
Table of Contents
Key Components of Accessible Videos
Creating a video generally takes much more time and effort than just throwing up a graphic. You must find people willing to be in the video (an issue all of its own), storyboard, shoot, edit, and optimize it for social media and the web.
All that work means that you want everyone to get the context of the video, right?
Of course, it does!
You created a great script and narration for this video, and you know that if people just watch it, they’ll want to work with you.
The cruel irony? A ton of people watch videos online with the sound turned off.
But something you might be forgetting – not everyone can hear that narration or see your videos.
So, how do we make our videos accessible to everyone?
Provide Captions
You need to add captions if you have any kind of narration in your video. Not only does this help those who are hard of hearing get the content of your video, but it can aid those who are watching with their sound turned off or even have ADHD and like the captions to aid their comprehension.
And there’s zero reason to skip this step because there are many free and automated options to get captions on your videos.
Social Media
Most social media apps now provide auto-generated captions; you just have to toggle on the option. Many apps (like Instagram) burn the captions into the video, meaning they’re there no matter what.
Others, like TikTok, allow you to let the user choose whether or not they see the captions so they can select the best settings for them.
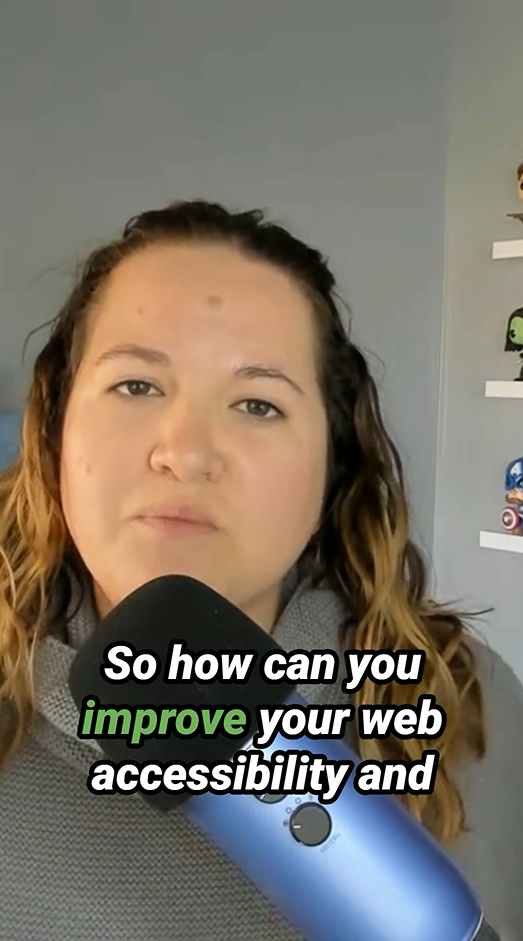
You can create more stylized captions using apps like Descript or Captions. You’ll see a lot of these on social media and they tend to highlight the word being spoken (which I appreciate).
YouTube & Longer Videos
If you’re creating videos on YouTube or embedding longer videos into your website, you can use some tools like Descript or get more control over your captions with services like Rev.com.
Rev allows you to upload your video file and either have a human transcribe it for you (for higher accuracy) or use their auto-generated service that you can go through and fix yourself.
I love that I can get the correct captions and upload the SRT file to YouTube, Vimeo, Facebook, and other spots, so you only have to do the work once.
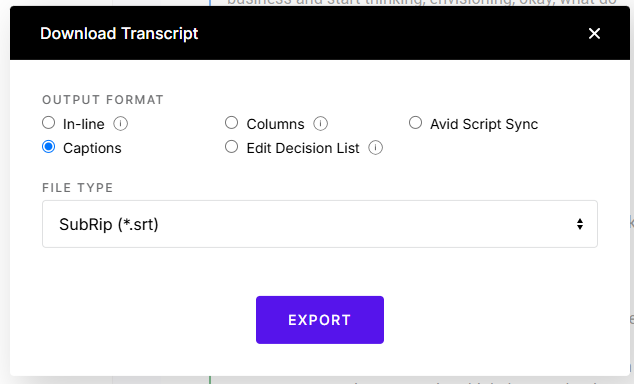
You can also get an SRT file through Adobe Premiere Pro if you use that for editing your videos.
Caption Tools Recap:
Depending on how you create your videos, there are plenty of ways to generate captions.
I love:
- Instagram & Facebook (Burned-in, auto-generated)
- TikTok (Optional, auto-generated)
- Descript (Free and Premium options)
- Rev (Paid only)
- Adobe Premiere Pro (Included with the plan)
Include Audio Descriptions
How do you reach your customers with videos when they have visual impairments?
You might want to include some audio descriptions.
Have you ever turned on the audio descriptions on a streaming service like Disney+? I encourage you to do so you can see what it’s like.
Audio descriptions do just what you think – they describe the visual content so blind and visually impaired individuals can understand the context of the show they’re watching.
(There was a hilarious audio description of Manny Jacinto in this summer’s Star Wars show The Acolyte).
View this post on Instagram
For most of our marketing content, we’re not going to have a ton going on on the screen that we need to provide audio descriptions; unfortunately, many apps don’t include them yet.
But one thing you can think about is how you or your narrator speaks during a video.
For example, I use a lot of charts and infographics in my Digital Marketing class at Wichita State. To ensure all of my students can understand the context of these graphics, I describe them during my lecture. Not only does this help those who are blind, but it helps if their internet speed is lower and they can’t see the picture on the slide.
Remember this when you’re writing your scripts and preparing to shoot videos.
Offer Transcripts Alternatives
What about those who want to go back and refer to your videos without scrubbing through the entire video? For those individuals, we create transcripts for our videos.
A transcript is a complete written description of the video. If you use Rev or Premiere Pro to generate the captions for the video, you can also download a text file that you can copy and paste into your website as the transcript.
If you record podcasts, transcripts are a great way to allow your hard-of-hearing users to get access to your content. And remember – some prefer reading something, like to read while they watch, or just want to go back and revisit an idea. Transcripts make that so much easier.
One thing I’d recommend against – don’t upload a PDF of a transcript. This puts it in a format that may not be useful for those needing a screen reading device.
Tools to Create Transcripts:
- Rev (Paid only)
- Adobe Premiere Pro (Included with the plan)
Your video is on your website now, but can everyone use the player?
That’s the next step in ensuring your videos are accessible to your audience.
When working with clients on their websites, I often recommend using a video player from a service like YouTube or Vimeo to play their videos.
This allows us not to use their website server’s resources but instead pull them from someone else. Lamen’s terms – it makes the video and website load faster, which, yay!
The great thing is that both YouTube and Vimeo follow WCAG best practices for their videos, so you can use those services to embed videos into your website without worrying about the super technical stuff.
But, if you’ve ever pulled an embed code from YouTube or Vimeo, you know you have some settings options. Here are the ones you need to set to keep it accessible.
Don’t Allow Autoplay
If you’re over 30, you might remember the dark days of the internet when music and videos would just start playing on their own and blast out of your speakers. It was embarrassing, especially when you were in the library, around people studying, or sitting in an office; now, you look like you’re not productive! (Kids, headphones weren’t the norm back then, OK?)
As a seeing person, you can quickly turn off the video and limit the annoyance. But imagine that you use a screen reader and have to tab throughout the page to try and find the offending video.
Yea, we’re not doing that.
You never use the autoplay feature when you embed any video on your website. Instead, you allow your users to choose when to play the video. And yes, that means that some of them aren’t going to watch your video, but that’s OK. Letting them choose is better than forcing them to watch and make them mad.
Don’t Hide Player Controls
We do not want to hide the player controls. That means your users should be allowed to click play or pause whenever they want.
These controls also need to be accessible by using the keyboard. For instance, pressing the space bar should pause the video when it’s playing.
We want to ensure that we’re giving people control over the videos they watch.
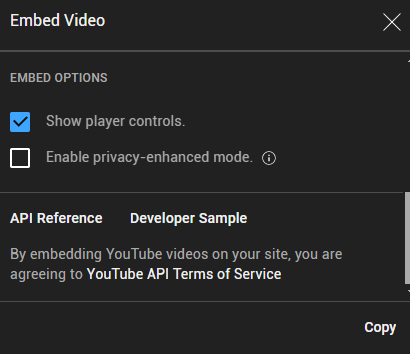
When you embed via YouTube, you want to ensure that you’ve checked Show player controls:
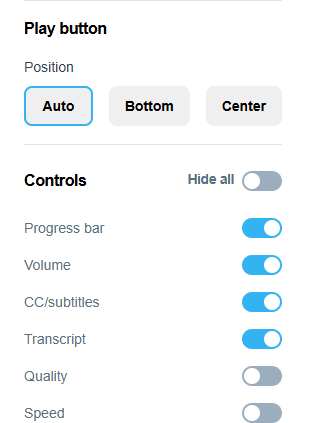
For Vimeo, you’ll go to Player settings and then scroll down to Controls. You can deselect some options, but Vimeo actually requires that you have the Player controls at all times.
Allow Toggling Captions
You’ll need to upload the SRT file or enable auto-captions on your videos to make this work, but you want to ensure that your users can choose whether or not to turn on captioning.
This is automatically set in your videos for YouTube, but you can turn this off on Vimeo under CC/subtitles. (Don’t do that, keep that checked!)
What About Background Videos?
If you like the look of a video that plays behind your content, you need to use autoplay here to get that look.

But why is this different?
Because, for a background video, you want to ensure:
- It has no sound – this is muted only!
- It’s set to loop, so it plays over and over again
- It’s only for decorative purposes
Background videos are decoration only; they shouldn’t have text, narration, music, or anything else. You’re just providing a visual element. They’re typically less than a minute long, which means you can upload them directly to your website, as it won’t pull as many resources.
Because it lacks sound, we can allow the video to autoplay. However, you still need to provide a way to pause the video to assist those with motion issues.
Videos Can Be For Everyone
There’s a misunderstanding that videos can only be used for a select group of your audience. Or worse, that it’s OK that you’re excluding people from your videos.
That doesn’t have to be the case.
Over the last several years, hard-of-hearing people have called out the lack of captions on celebrity and creator videos to help push a movement forward. It took far too long, but big platforms like Instagram, Facebook, and TikTok added auto-captions to their services to allow everyone to benefit from the videos on their platforms.
Don’t get called out for excluding people who can learn from you.
Start by simply adding captions to your videos, and you’ll see an increase not only in your engagement but also in your inclusivity.
Let’s be good stewards of the internet and follow some basics to create and share accessible videos.
